Connect Salesforce to OPNBI
By using this document user will know how to connect Salesforce to OPNBI.
Salesforce integration is the process of merging the data and functionality of Salesforce with another application to provide users with a single unified experience.
Objective
- Connect Salesforce to OPNBI.
Usecase
- Salesforce allows users to fetch data from salesforce & integrate it with your company application. For example; in this document, we will fetch the data from salesforce & integrate it with OPNBI.
Steps to Connect Salesforce to OPNBI
1. Salesforce
- Salesforce provides the powerful source of the API which helps in developing and customizing your data.
log in to your Salesforce developer edition.
Follow the given links to know how to set up your salesforce login.
User needs to Create the Connected App first.
Note
- Follow this link to see how to create the connected app.
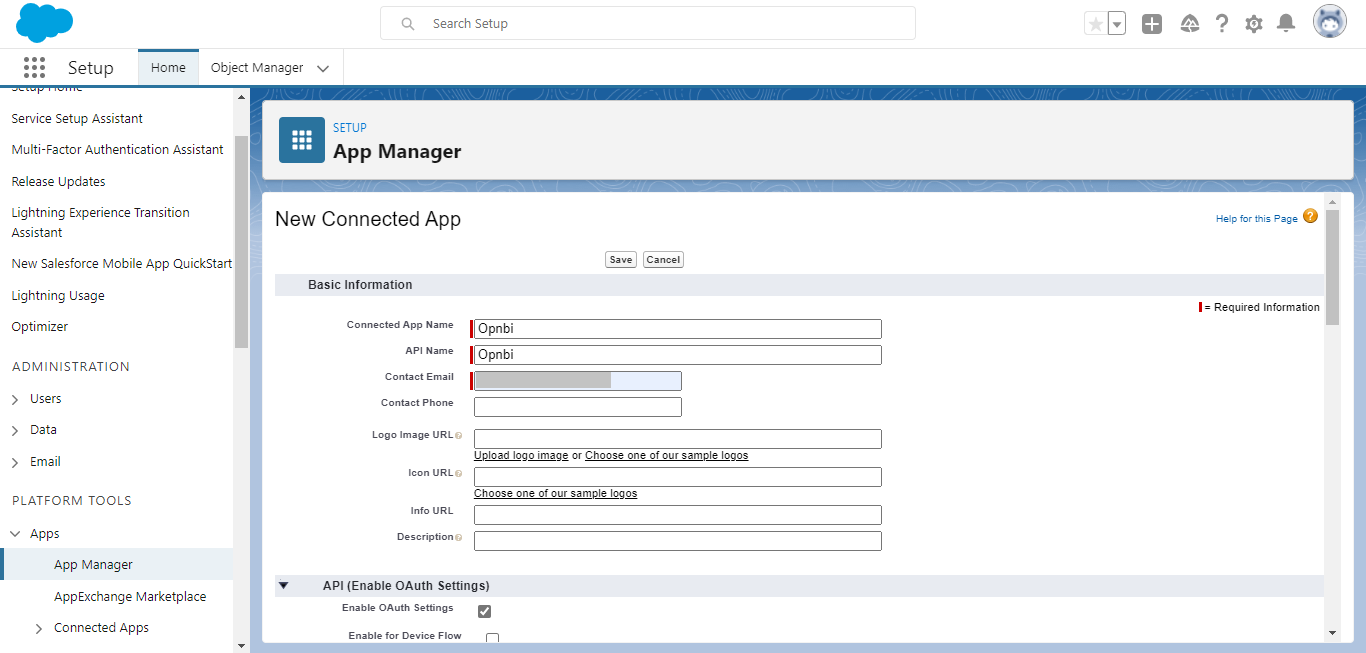
- While creating the Connected App fill below details:
- Connected App Name: Opnbi
- API Name: Opnbi (it will be filled automatically)
- Contact Email: Your email address
- Enable OAuth Settings: Check the checkbox
- Set callback URL:
https://na11.salesforce.com/ConnectTest/oauth/_callback- Selected OAuth Settings: Manage user data via APIs (API)
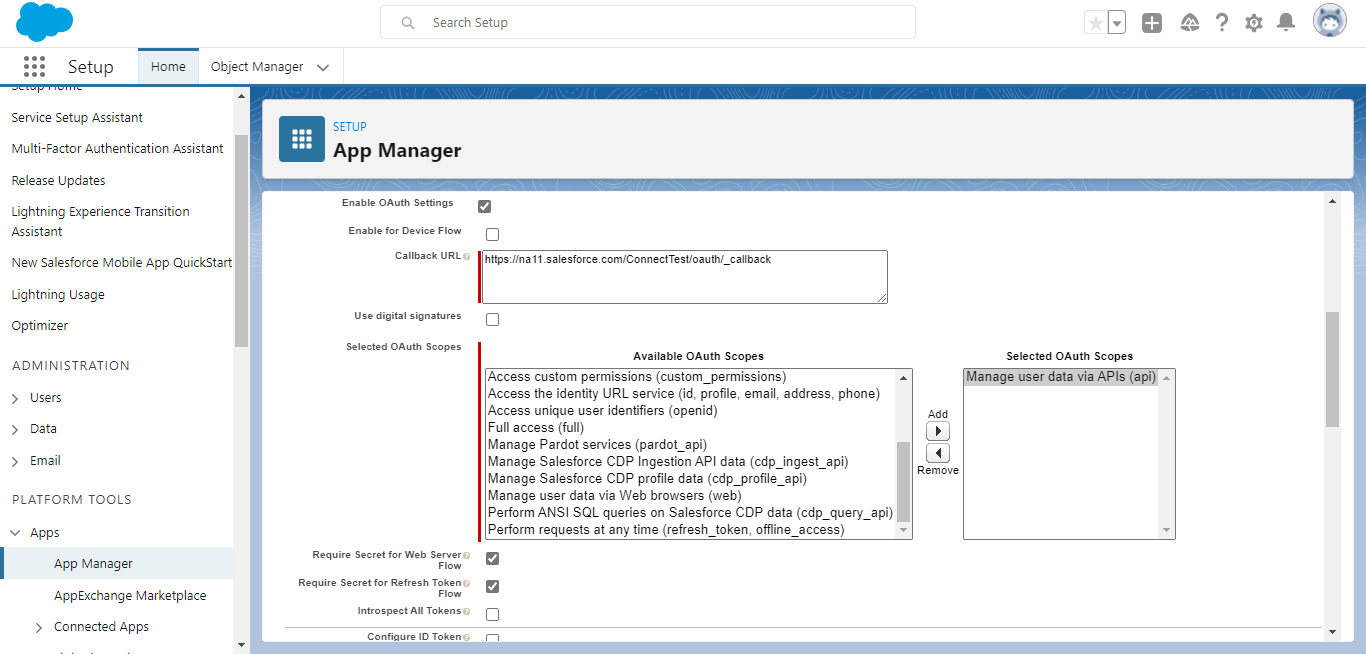
Scroll down & click on the Save button. It will ask you for permission.
Click on Continue button & your connected app is created.
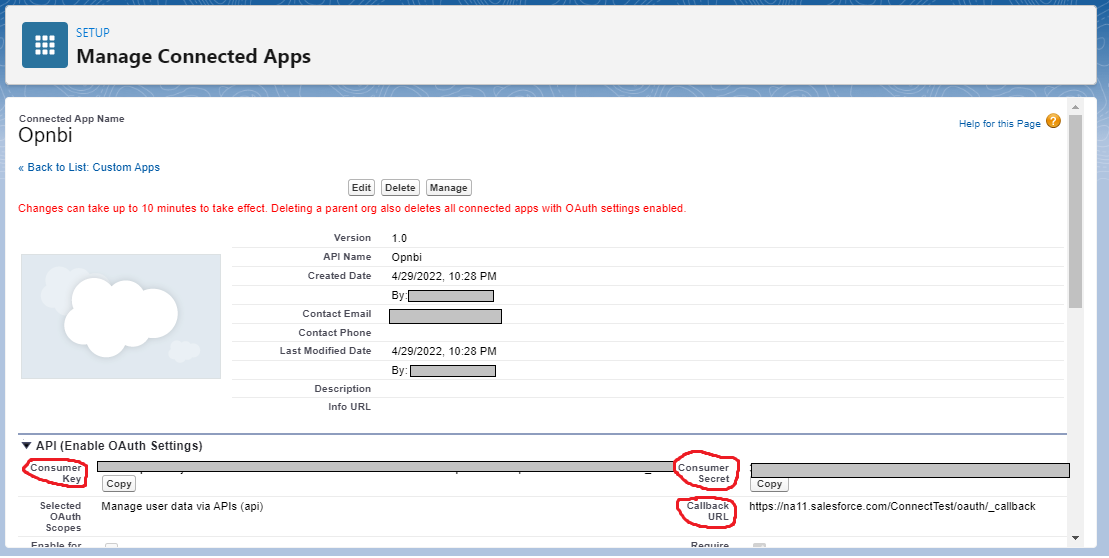
User can copy & paste Consumer Key, Consumer Secret & Callback URL to a notepad for further use.
- How to get Security Token?
By following this link use can generate the Security Token.
Reset your security token & save it in a notepad for further use.
Note
- Click on this link to download the project files.
2. Eclipse
Import the downloaded project into the Eclipse.
Open java project file & new.properties file.
User needs to place the required jar file into the project. (Jar files are included in the downloaded project zip file)
User needs to fill the below details in the new.properties file:
- loginInstanceDomain=login.salesforce.com
- apiVersion='your salesforce api version'
- userName='your salesforce login username'
- password='your salesforce login password+security token'
- consumerKey='your consumer key'
- consumerSecret='your consumer secret'
- grantType=password
Save your project file.
Export the project jar file & give a name exds.
3. OPNBI
- OPNBI is a Business Intelligence application for both personal and business use.
Place that project jar file in the
OPNBI\tomcat\webapps\opnbi\WEB-INF\libfolder.Start your server & launch OPNBI.
Go to hamburger menu
--> datasource.
Click on Create from the bottom-most toolbar.

Find Custom from the search box:
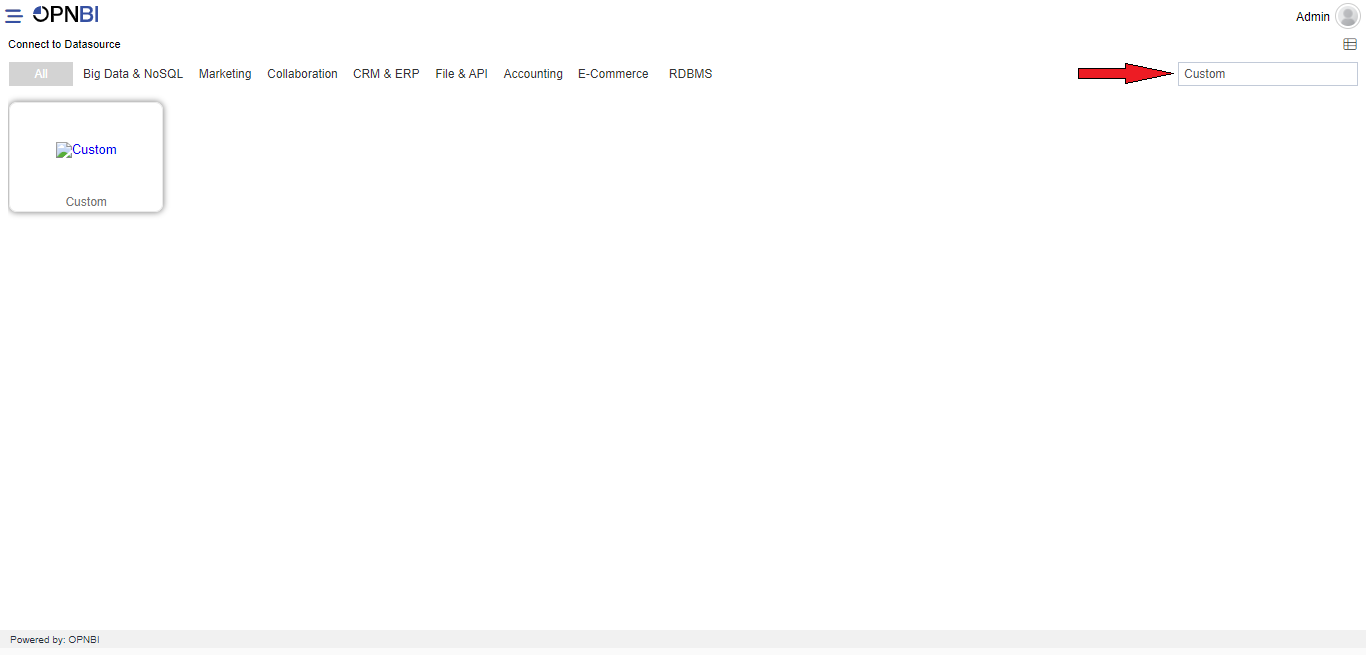
Click on Custom & fill in the details as shown:
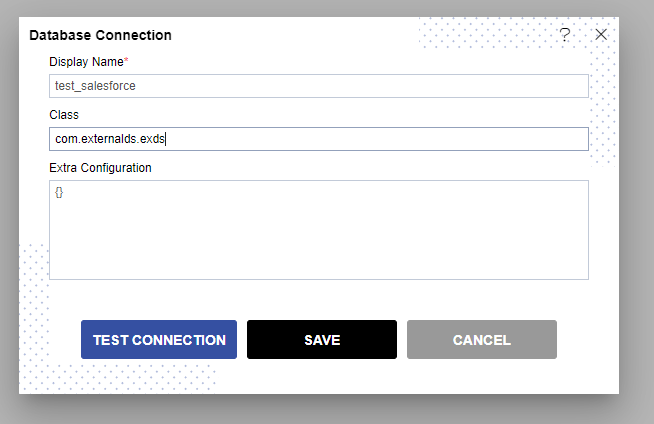
Click on the TEST CONNECTION button & one message is shown for Connection Successful.
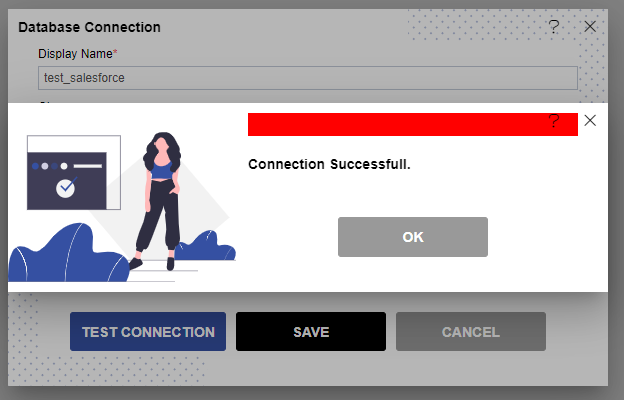
Click on the OK & SAVE button & Go to the Datasource section in OPNBI.
Select created Datasource & click on Create Dataset from the bottom-most toolbar.
Give your dataset the name s_contacts.
In Additional Info users need to paste their query. (User can get the sample query from the readme file available in the project zip file)
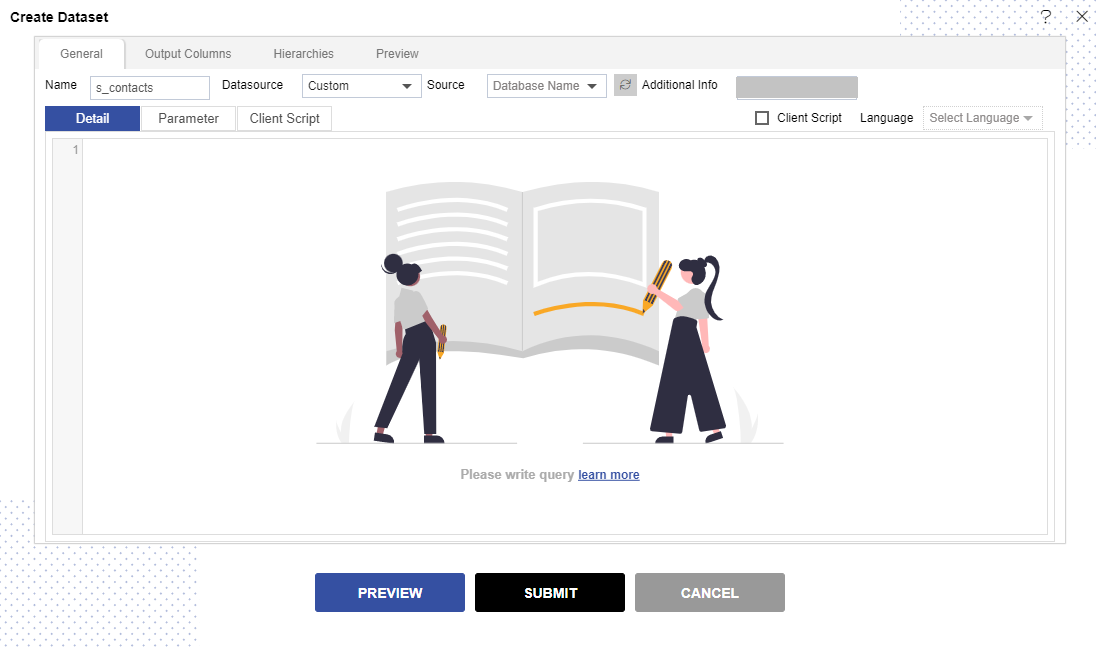
Click on the PREVIEW button & data of contacts is shown.
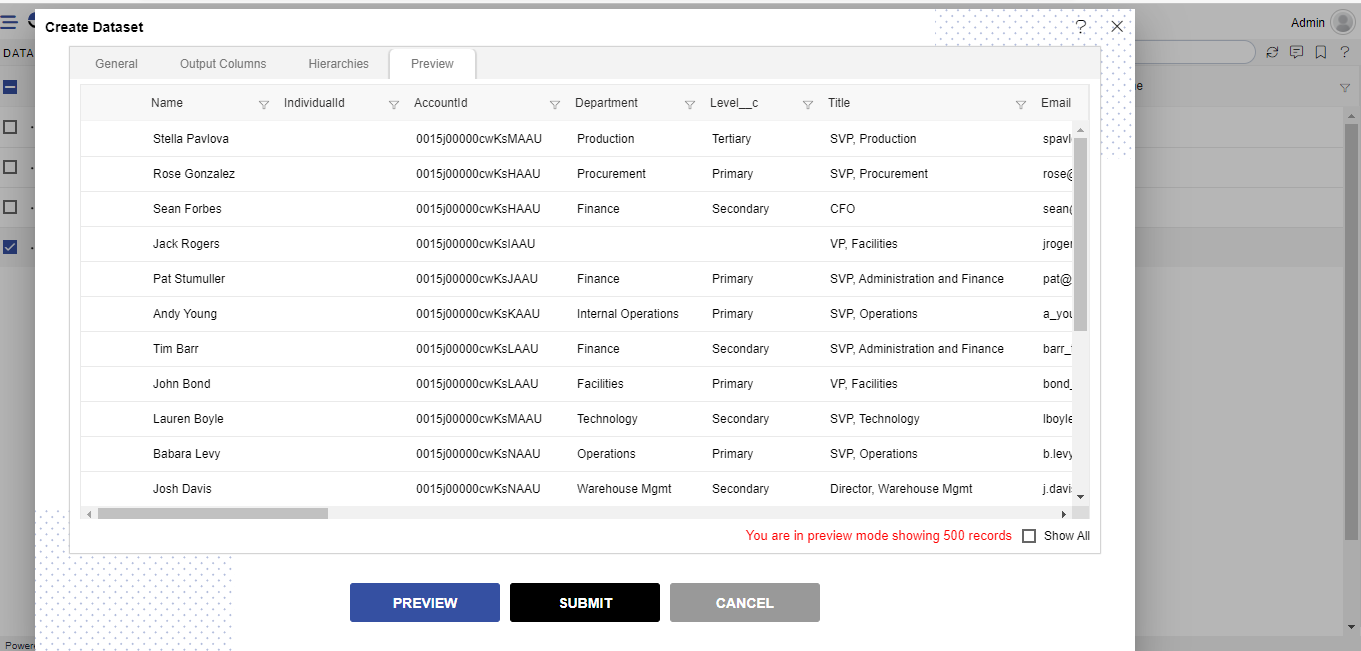
Click on SUBMIT button & your dataset is created.
To know how to create dashboard using this dataset follow this link.